Have you ever stopped in front of a flowing line of Arabic script and wondered how a simple reed pen made something so graceful? That curiosity is the best place to start Arabic alphabet calligraphy for beginners.
The good news is that you don’t need artistic talent or expensive supplies to begin. You need a clear path, the right script, a steady hand you can train, and a few minutes of focused practice each day.
At Kalimah Centre, we’ve watched many learners fall in love with Arabic through its letters. This guide turns that experience into one practical plan, from choosing your first pen to writing your first connected words.
By the end, you’ll know what to practice first, which free tools can help you, and how to keep improving week after week without losing motivation or feeling overwhelmed.
1. Start Arabic Alphabet Calligraphy For Beginners With The Right Script
Your first decision shapes everything that follows. Arabic alphabet calligraphy for beginners works best when you commit to one script, because each style has its own proportions, angles, and rhythm. Mixing styles too early slows you down and blurs your sense of what a correct letter looks like. Here’s how to choose.
Why Naskh Is The Best First Script
Naskh is the clearest and most balanced script for a beginner. Its letters are compact, rounded, and easy to read. That’s why it became a standard hand for copying the Quran and, centuries later, the model for most printed Arabic you see today.
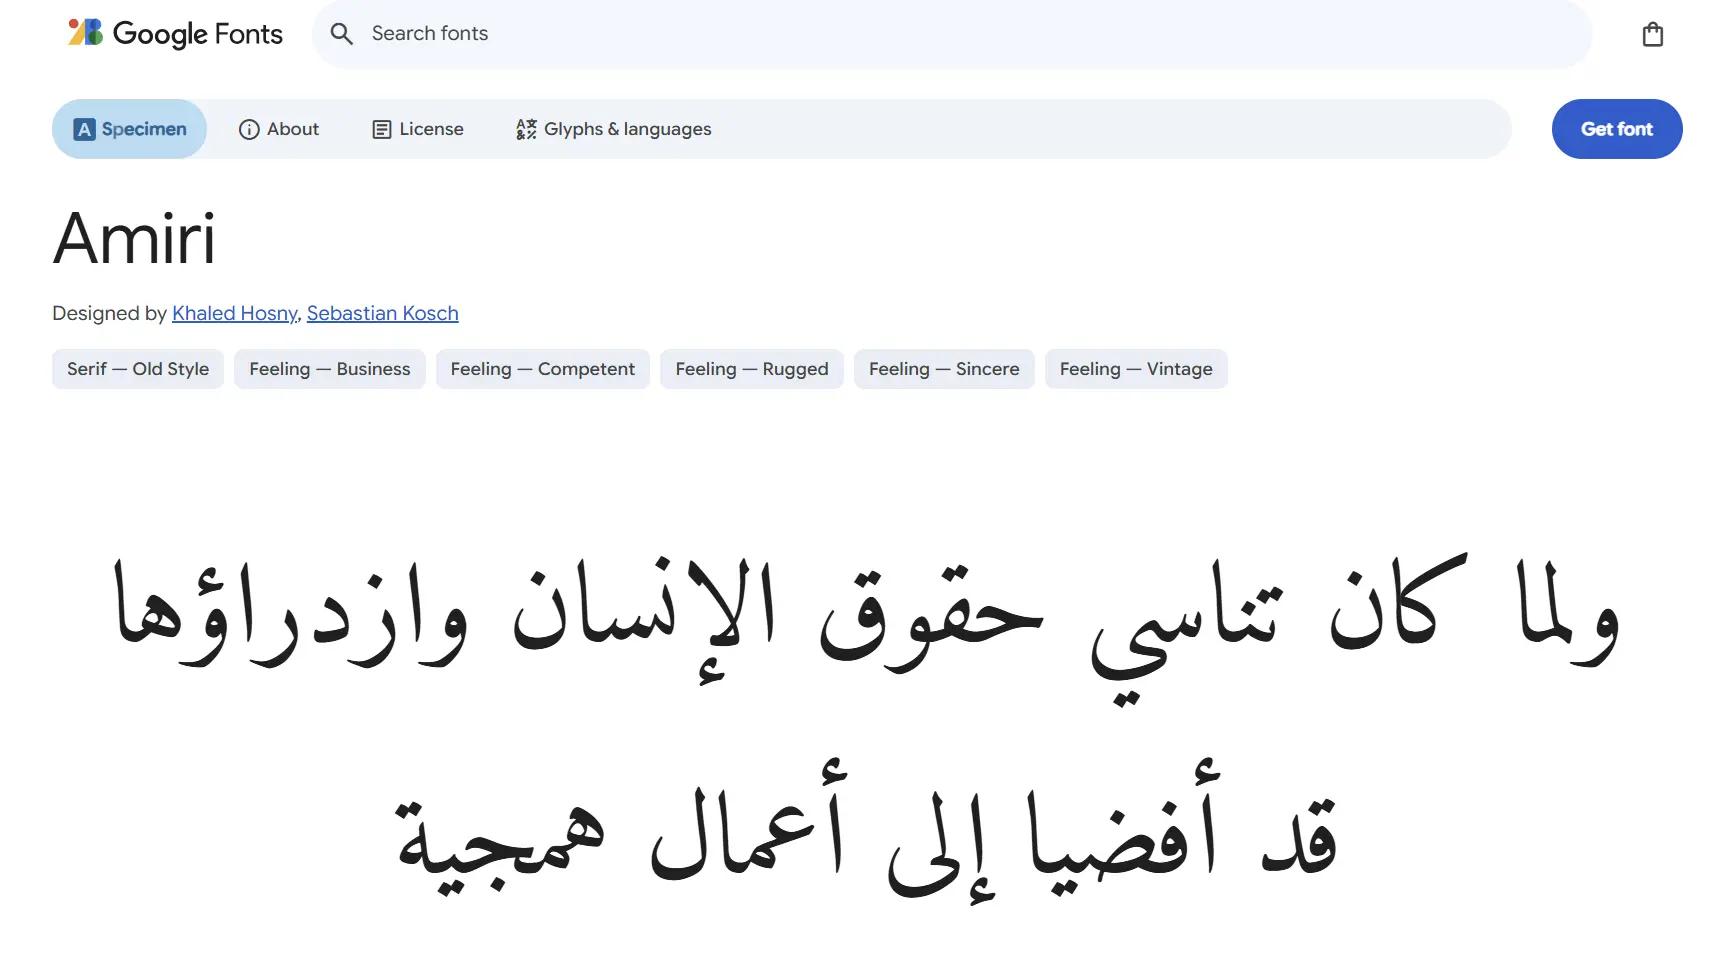
You already see Naskh in books, signs, and textbooks, so your eye has a built-in reference. Every letter you write can be compared with shapes you meet every day. To see clean Naskh letters on screen, try the free Amiri typeface on Google Fonts, a classical Naskh design you can type, enlarge, and print as a tracing guide.
Your pen learns faster when your eyes can read what it writes. Pair every practice sheet with real Arabic lessons. Kalimah Centre’s Online Arabic Course builds reading, writing, and speaking together, so the letters you draw turn into words you understand and use.
When Ruq’ah Makes Sense For Beginners
Ruq’ah is a good alternative if your main goal is faster, neater everyday handwriting. It developed in the Ottoman period as a practical script. Today, many Arabic speakers use it for notes and quick writing because its short strokes sit mostly on the baseline.
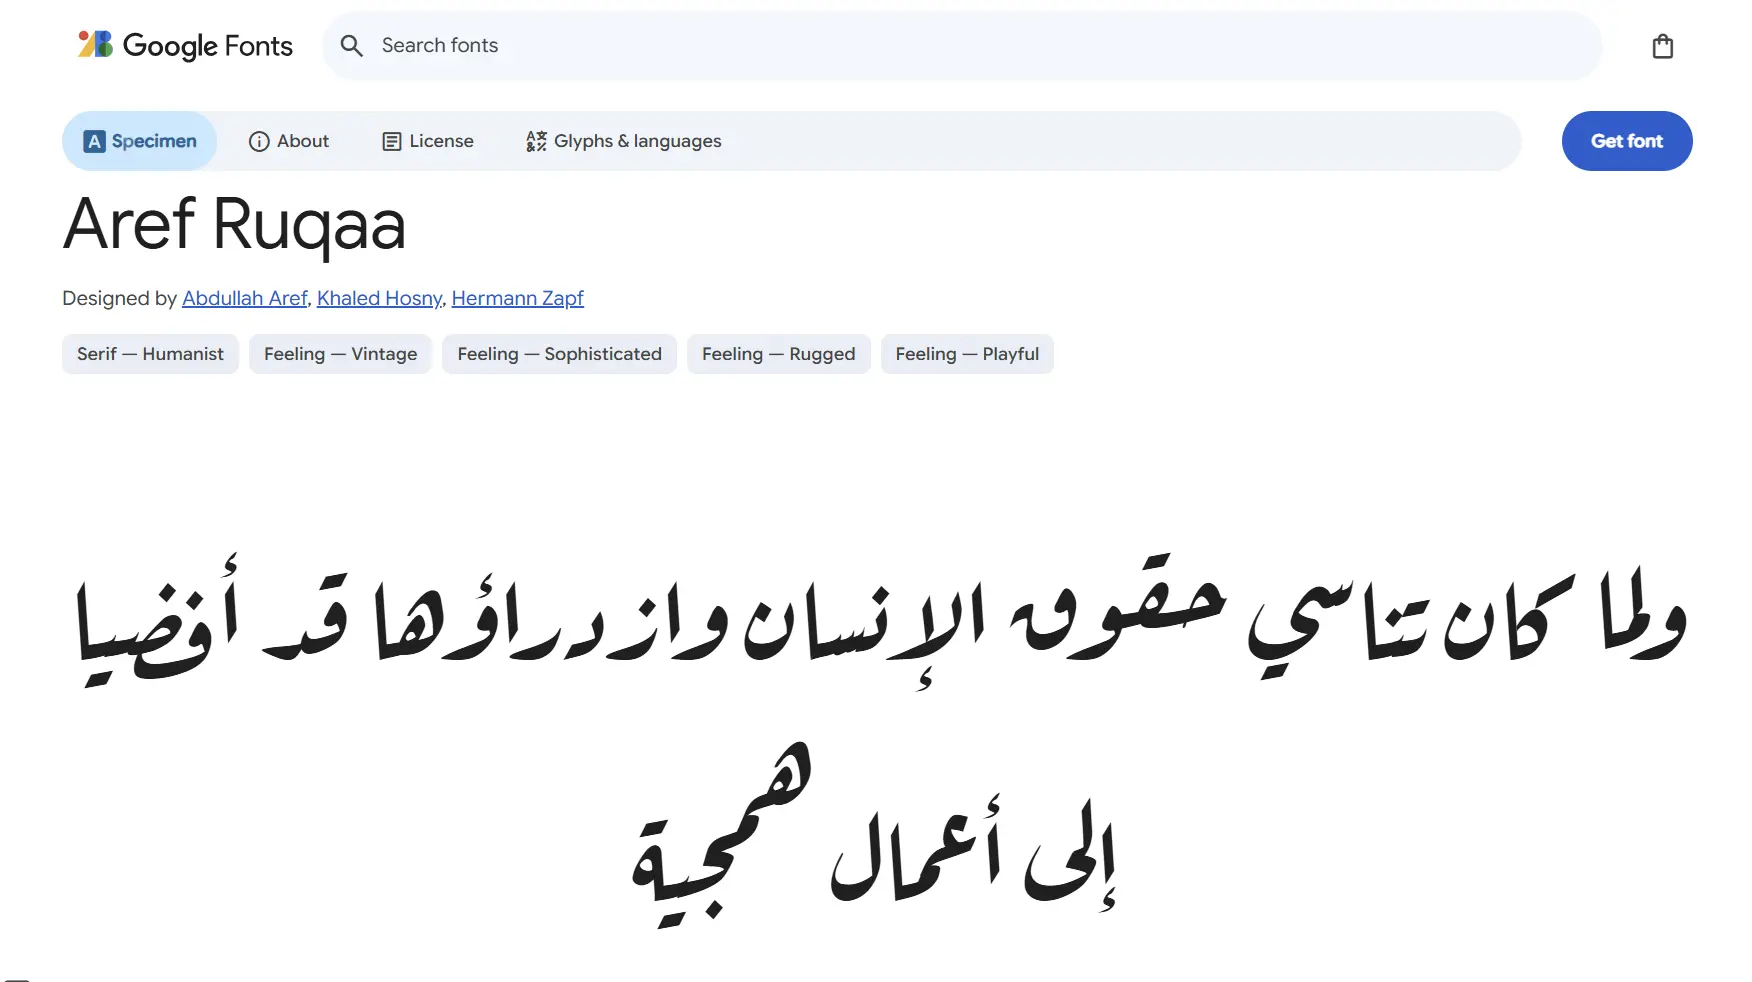
The trade-off is that Ruq’ah drops many of the curves and proportions that train your hand for classical scripts. Learners who start with it often find Naskh harder later, while going from Naskh to Ruq’ah is easier. You can preview the style on the Aref Ruqaa font page, which is modeled on classical Ruq’ah.
A practical approach is to start with Naskh for structure and add Ruq’ah after a few months. By then, you’ll see how each letter gets simplified and why. That makes Ruq’ah a quick win rather than a confusing restart, and your everyday handwriting gets neater too.
Scripts To Save For Later – Thuluth, Diwani, And Kufic
Thuluth, Diwani, and Kufic are beautiful, but they need control that beginners don’t have yet. Thuluth uses tall verticals and sweeping curves often seen on mosque walls. Diwani, a script from the Ottoman court, stacks letters into dense, flowing compositions that are hard to read.
Kufic is the oldest of the major styles and the script of many early Quran manuscripts. Its angular, geometric shapes look simple, but spacing and balance are hard to master. For a quick look at Kufic shapes, see Reem Kufi on Google Fonts, a typeface based on early Kufic models.
Treat these scripts as inspiration, not homework. Save examples you love in a folder and come back to them once your Naskh letters look consistent. That way your motivation keeps growing without pulling your practice in five directions at once.
Read Also: How to Learn the Arabic Alphabet: Easy Step-by-Step Guide
2. Gather Simple Calligraphy Tools For Your First Lessons
A small, inexpensive kit is all Arabic alphabet calligraphy for beginners needs, and you can upgrade later. You need a pen that makes thick and thin lines, ink that flows evenly, and paper smooth enough to show your mistakes clearly. The sections below cover each tool, plus a few free digital extras.
A. Choose Your First Pen – Qalam, Bamboo, Or Broad-Edge Marker
Start with a broad-edge calligraphy marker or a bamboo pen, then move on to a traditional reed qalam. Markers with a 3.8 mm or 6 mm chisel tip need no cutting or dipping. That lets you focus completely on the shape of each letter during your first weeks.
The reed pen carries deep meaning in this art. The UNESCO listing for Arabic calligraphy knowledge, skills, and practices says the traditional qalam is cut from reeds or bamboo stems. The art was added to the Intangible Cultural Heritage list in 2021, with 16 Arab states taking part.
Beyond its history, the pen holds a special place in Islamic tradition, and many Muslim calligraphers see their craft as a way of honoring the written word.
Allah Almighty says:
“ٱلَّذِى عَلَّمَ بِٱلْقَلَمِ”
“Who taught by the pen” (Surah Al-Alaq, 96:4)
This verse comes from the very first revelation, and it presents the pen as a means through which Allah gave knowledge to humanity. For many learners, this turns each practice stroke into more than a hobby. It becomes a way of respecting writing and learning.
B. Pick Beginner-Friendly Ink And Paper
Use smooth, non-absorbent paper and a fluid black ink for your first months. Laser printer paper or marker paper works well. Rough or soft paper makes ink bleed and hides the sharp edges your letters should have, so you can’t see what needs fixing.
Classical masters worked on polished, starch-coated paper with handmade ink, but you don’t need that yet. A bottle of non-waterproof black calligraphy ink, or just your marker, gives clean lines. It also washes off your hands and desk easily, which matters when you’re practicing every day.
Calligraphy is even more fun when the whole family picks up a pen. Let your children learn the letters right beside you. Kalimah Centre’s Online Arabic Course For Kids introduces young learners to Arabic letters and words through interactive online lessons, so your practice table becomes a shared family space.
C. Use Free Digital Tools For Extra Practice
Free apps let you practice letter shapes anywhere, even without ink. They can’t replace a real pen, because a stylus doesn’t fully reproduce the thick-and-thin contrast of a nib. But they’re excellent for drilling stroke order during short breaks in your day.
On a tablet or computer, try Krita, the free and open-source painting program, which supports pressure-sensitive brushes. Import a Naskh model, lower its opacity on a separate layer, and trace over it until the movement feels natural. Then hide the model and try writing the letter from memory.
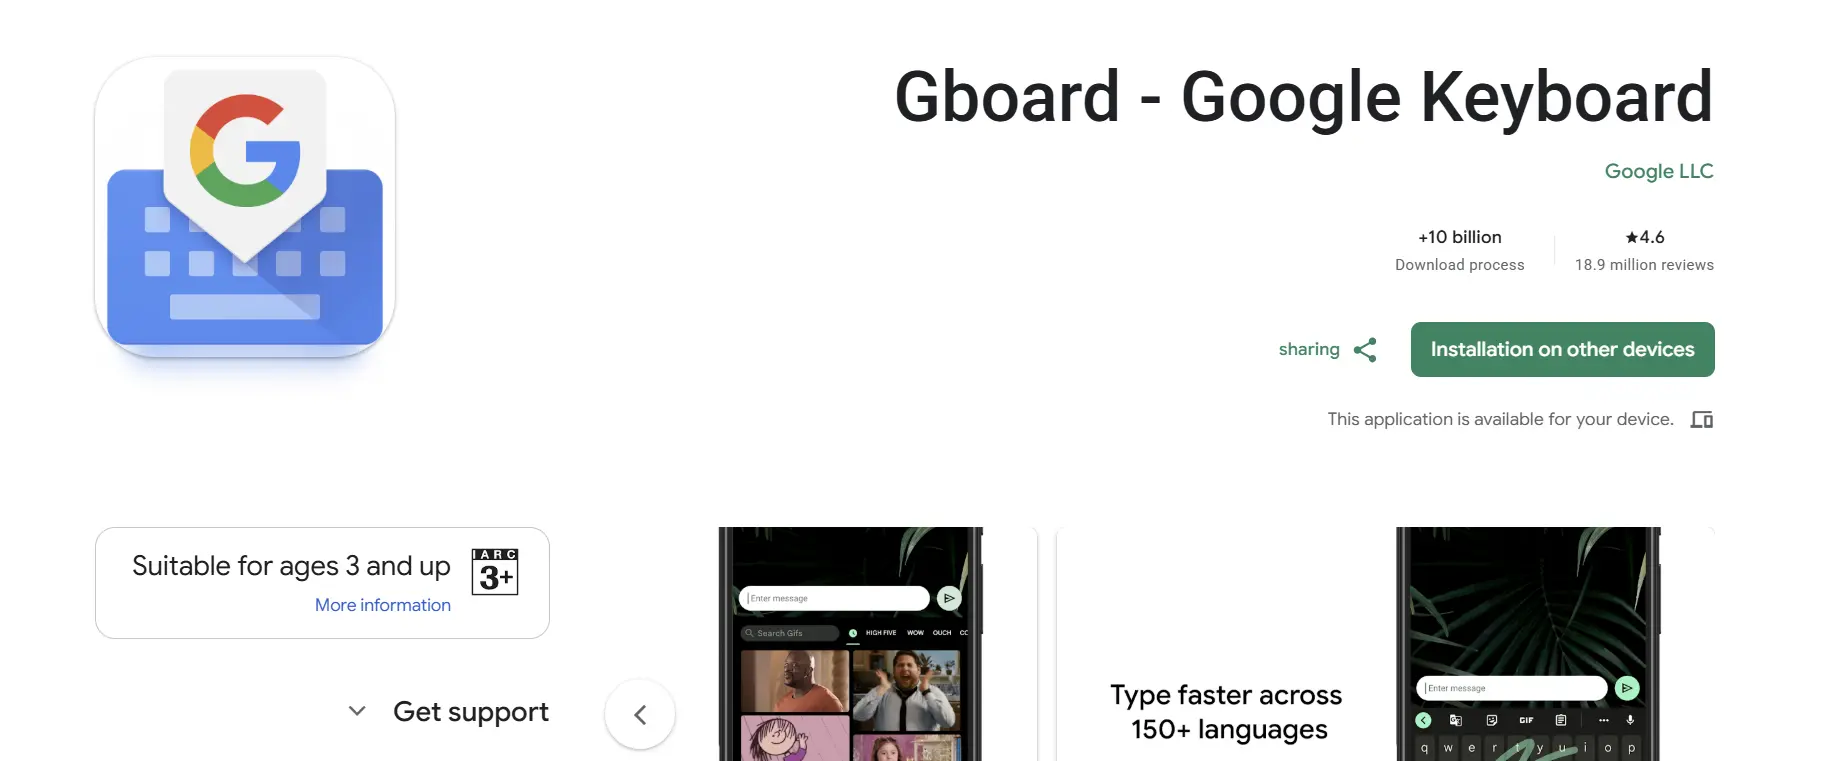
On your phone, turn on handwriting mode in the free Gboard keyboard app and add Arabic as a language. Write a letter with your finger. If the keyboard recognizes it, your basic shape is readable. It’s a quick, playful way to test your memory of each form.
Experience Kalimah Center Classes
Watch real excerpts from our live sessions at Kalimah Center and see how we bring learning to life. These clips highlight our interactive, student-centered teaching approach across all our courses—designed to keep learners engaged, motivated, and actively involved every step of the way.
Master Arabic with Kalimah Center
Join our expert-led online classes and start your journey toward Arabic fluency today.
Book Your Free Trial3. Learn The Pen Angle And The Dot Measurement System
Precision in Arabic alphabet calligraphy for beginners comes from two habits: holding the pen at a consistent angle and measuring letters in dots. Learn these early and every letter that follows will fall into proportion more naturally. These are the foundations that classical calligraphers have relied on for centuries.
A. Hold The Pen At A Steady Angle
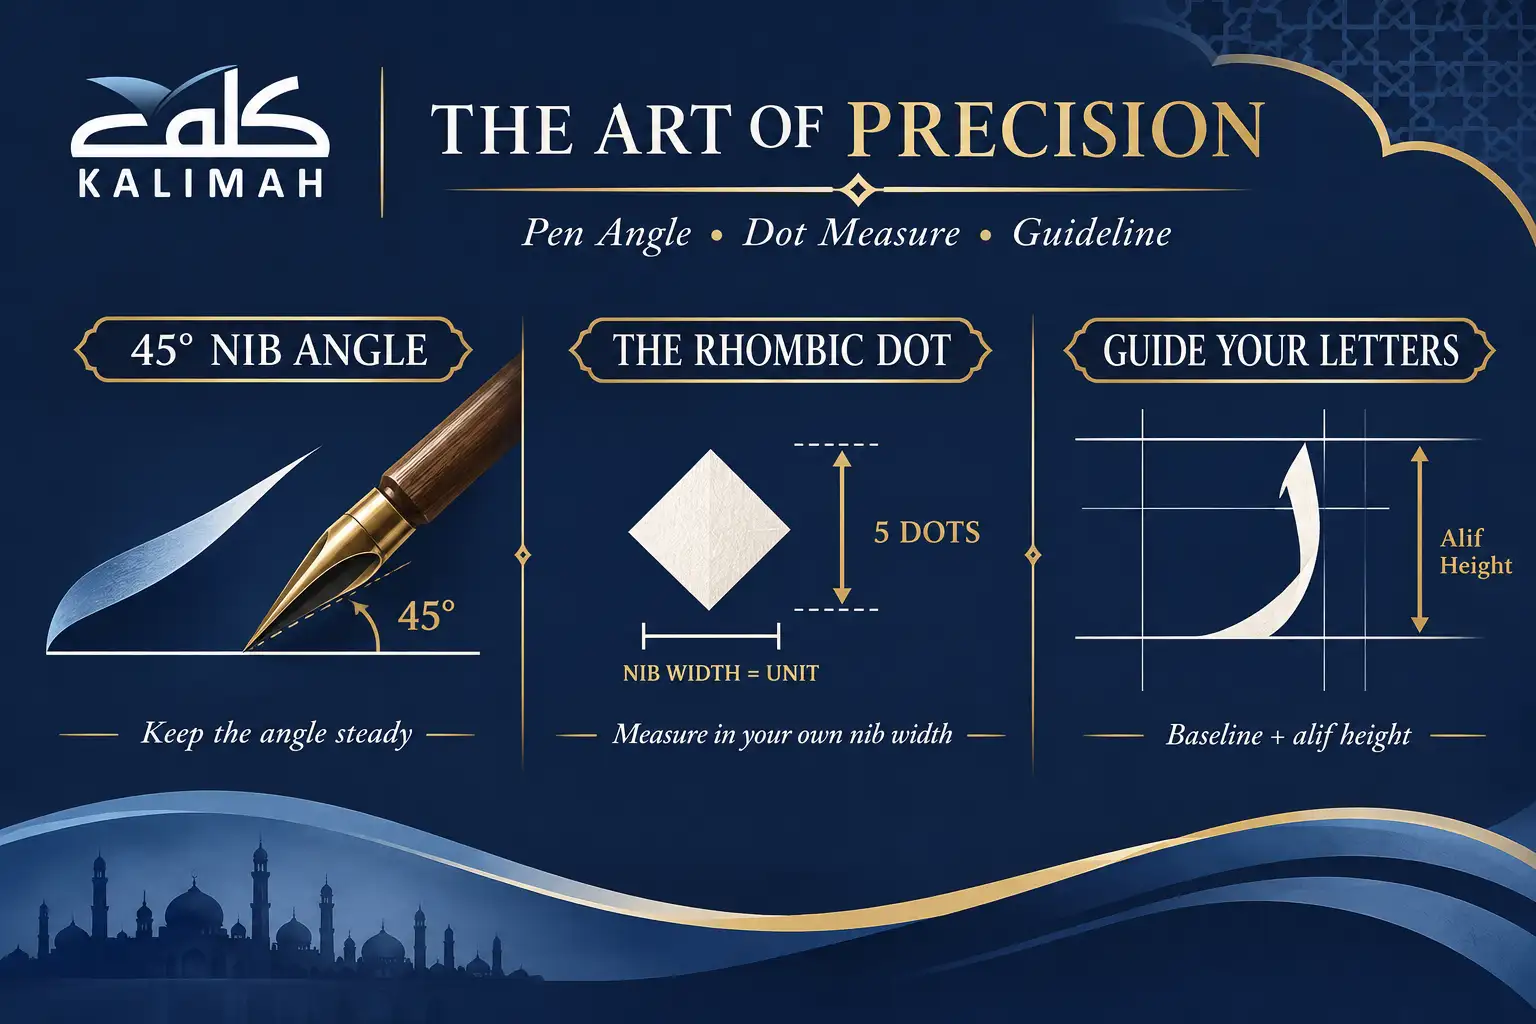
Hold the nib at roughly 45 degrees to the baseline and keep that angle fixed as you move. This one habit creates the natural contrast of the Arabic calligraphy alphabet: thin lines on some strokes and thick lines on others, without pressing any harder.
Many beginners rotate the pen without noticing when they reach a curve. To catch this, draw a row of short diagonal strokes and then a row of zigzags. If the thick and thin parts look the same across the whole row, your angle is steady. If they vary, slow down.
The exact angle shifts slightly between scripts and teachers, and some Naskh models use a steeper angle for certain strokes. Start with one consistent setting and follow a single model. Adjust only when a teacher or model clearly shows a different approach.
B. Measure Every Letter With The Rhombic Dot
The rhombic dot is the ruler of Arabic calligraphy. You make it by pressing the full width of your nib onto the paper in a short diagonal stroke, which leaves a small diamond. Each letter’s height and width is then measured in these dots.
The system is traditionally credited to Ibn Muqla, a 10th-century Abbasid vizier and calligrapher who based letter proportions on the dot, the alif, and the circle. Because the dot comes from your own pen, the system scales automatically, whether your nib is 2 mm or 6 mm wide.
In many Naskh models the alif stands about five dots tall, though some teachers use slightly different counts. Before each session, draw a vertical ladder of stacked dots in the margin. It becomes your measuring stick for that pen size and keeps your letters consistent.
C. Draw Baselines And Guide Grids On Your Practice Sheet
Always write on guidelines while you’re learning. A baseline shows where letters sit, and an upper line marks the height of the alif. Without them, your letters drift up and down and your sense of proportion never settles, even after weeks of practice.
To save time, use a free dot grid paper generator where you set the dot spacing, paper size, and orientation, then download a printable PDF. Match the spacing to your nib width and you’ll have ready-made guide sheets for every practice session.
Keep a calligraphy Arabic alphabet chart beside your grid sheet as a visual reference. Write each letter on the grid, compare it with the chart, and mark problem areas in pencil. Then you’ll know exactly what to repeat tomorrow instead of guessing.
Further reading: How to Write in Arabic: Step-by-Step Guide for Beginners
4. Practice The Arabic Calligraphy Alphabet Letters In Shape Families
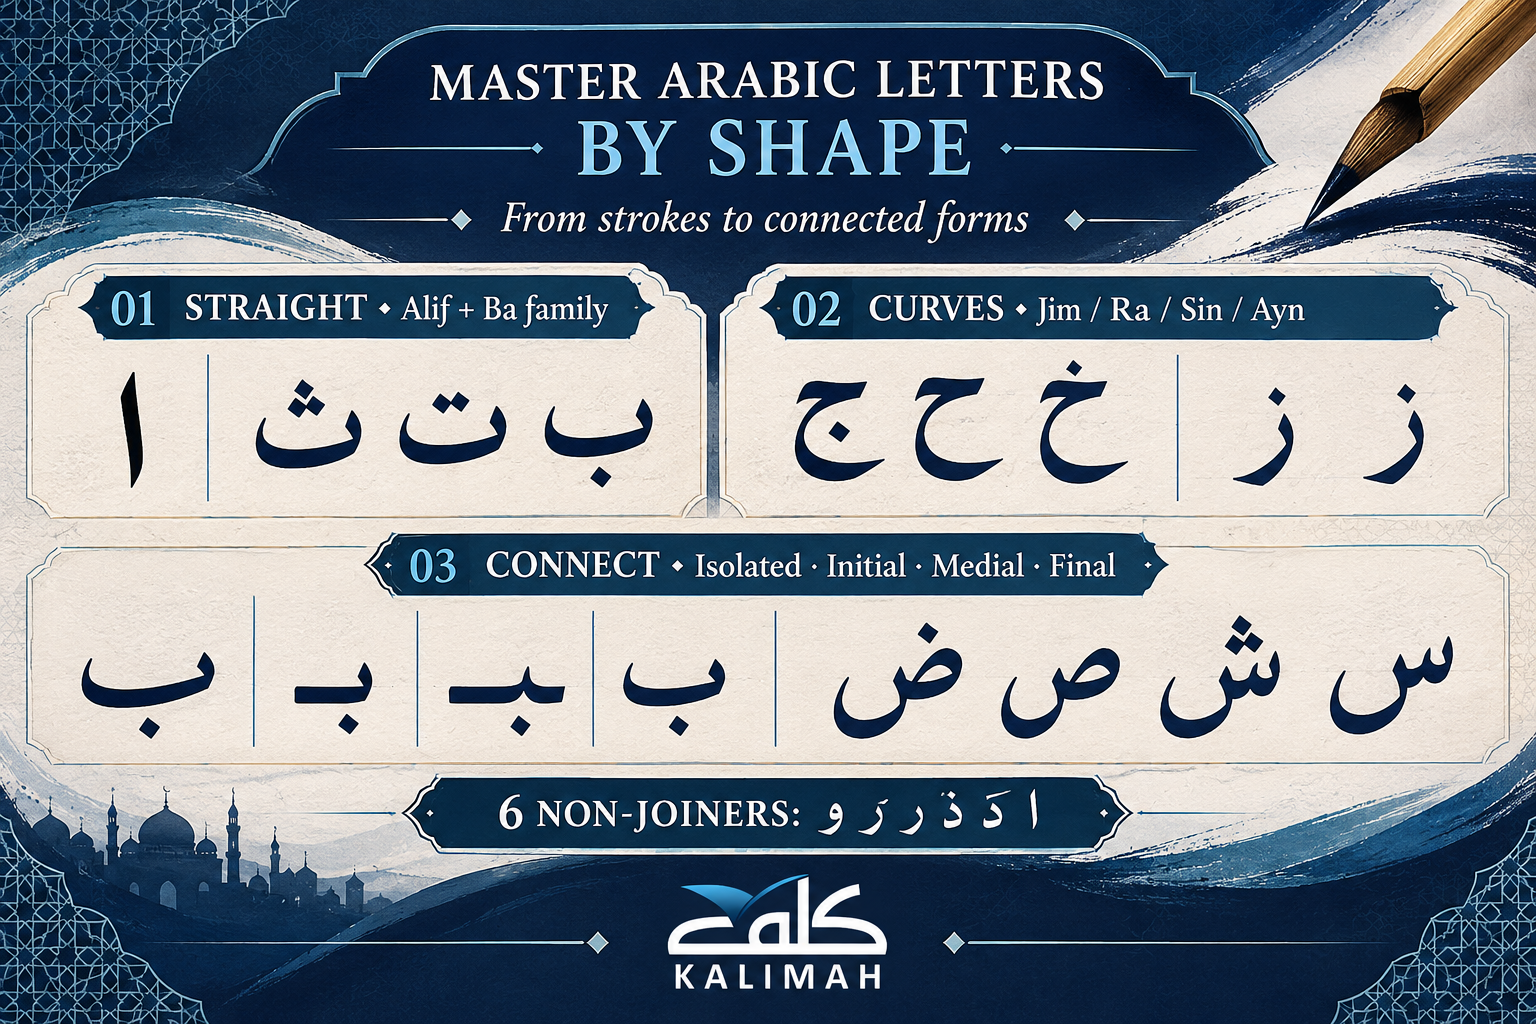
Learning Arabic calligraphy alphabet letters in shape families is faster than learning them in alphabetical order. Many letters share the same body and differ only in their dots, so mastering one shape unlocks two or three letters at once. The three stages below take you from straight strokes to curves and full letter forms.
A. Start With Alif And The Ba Family
Begin with alif (ا), the straight vertical stroke that sets the scale for the whole script. Practice it until you can write ten in a row with the same height, slant, and thickness. It looks simple, but it trains control better than any other letter.
Next, move on to the ba family: ب, ت, and ث share one boat-shaped body and differ only in their dots. Once that body is consistent, you’ve learned three letters. The same tooth shape also appears in the starting forms of nun (ن) and ya (ي).
Pay close attention to where the dots go in this family. Dots sit at a fixed distance above or below the body, and you make them with the same rhombic stroke you use for measuring. Careless dots are the fastest way to make otherwise good letters look unfinished.
B. Move To The Curved Families: Jim, Ra, Sin, And Ayn
After the straight and flat shapes, move on to letters with curves and bowls. The jim family (ج, ح, خ) introduces a sharp head with a deep, sweeping tail. Ra and zay (ر, ز) teach a short, controlled curve that drops below the baseline.
Sin and shin (س, ش) combine small teeth with a wide bowl, which tests both rhythm and spacing. Sad and dad (ص, ض) add a closed loop before that same bowl. Practicing them together shows you how one bowl shape repeats across several letters.
Finish with ayn and ghayn (ع, غ), then the remaining shapes: dal, ta, fa, qaf, kaf, lam, mim, ha, waw, and ya. As highlighted in The Met’s essay on calligraphy in Islamic art, calligraphy is among the most highly regarded Islamic arts, so every family you master links you to a long tradition.
C. Learn The Four Positions Of Every Letter
Most Arabic letters change shape depending on where they appear in a word: isolated, initial, medial, or final. Doing Arabic alphabet calligraphy properly means practicing all four forms, not only the isolated letters you see on alphabet charts and posters.
Six letters never connect to the letter that follows them: ا, د, ذ, ر, ز, and و. Mark them clearly on your reference chart. Knowing them in advance prevents one of the most common beginner errors, which is joining a letter that should break the connection.
Read it smoothly, and you’ll write it beautifully. Recognizing every letter form is half of a calligrapher’s work. Kalimah Centre’s Arabic Reading Course takes adults through letter sounds, shapes, vowels, and connections step by step, so every form you practice is one you can read with confidence.
Recommended reading: The Complete Arabic Alphabet Guide: Letters, Forms, Sounds & Practice
5. Join Letters Into Words And Build A Daily Practice Habit
Words are where your skill really starts to show. Connecting letters teaches you spacing, rhythm, and the small adjustments each letter makes for its neighbors. This last step also turns scattered sessions into a routine that keeps you improving month after month.
A. Write Your First Connected Words
Start with short words of two or three letters that you already know, such as بيت (house) or نور (light). Write each word slowly on your grid. Check that every letter keeps its correct height while the joins stay smooth and even.
Pay attention to the kashida, the horizontal stretch between letters. Beginners often stretch it too much or not at all. Keep connections short at first. Later you’ll learn to lengthen them on purpose to balance a line, the way classical calligraphers do.
A great milestone in Arabic alphabet calligraphy for beginners is writing your own name. It mixes connecting and non-connecting letters and it’s personally motivating. It also gives you one word to repeat every week, so you can see your progress clearly over time.
B. Copy Master Models Instead Of Guessing
Copying master models is the traditional way calligraphy has been taught. Instead of inventing shapes, you study a finished example, work out its proportions in dots, and copy it again and again until your version closely matches the original.
You can find inspiring examples for free. For a guided visual tour, open the A World of Calligraphy story on Google Arts & Culture. It presents Kufic, Naskh, Thuluth, Diwani, and Ruq’ah pieces from a museum collection, with short notes on each style.
To see the full process, watch this free calligraphy workshop video from the Ann Arbor District Library. In it, Dr. Nihad Dukhan shows the materials, sketching, inking, and correction techniques behind a finished piece. Pause often and copy the movements you see.
C. How Much Should Beginners Practice Each Day?
Beginners should practice about 20 to 30 minutes a day, on most days of the week. Short, focused sessions build muscle memory better than one long weekend session, because your hand needs frequent repetition to make each movement automatic.
Keep each session simple: five minutes of warm-up strokes, fifteen minutes on one letter family or word, and a few minutes reviewing what went wrong. Date every practice sheet and keep it in a folder. Comparing sheets each month shows progress you might otherwise miss.
Practice feels lighter when you’re not doing it alone. A class schedule keeps your pen moving every week. Kalimah Centre’s Arabic Group Classes give you a steady learning rhythm alongside fellow students, helping you stay consistent with Arabic while your calligraphy routine grows.

Related read: Learn to Read and Write Arabic: Complete Beginner’s Guide (+ Speaking)
Learn The Arabic In Every Stroke With Kalimah Centre
Calligraphy reaches its full beauty when you understand what you’re writing. A calligrapher who knows the language sees why a word breaks where it does, which letters a phrase needs, and how meaning shapes a composition. That understanding is exactly what Kalimah Centre helps you build.
Kalimah Centre’s curriculum is organized into clear, progressive levels, so you always know what comes next, much like moving from alif to full words in this guide. You can choose individual lessons for personal attention or group classes for shared momentum, and focus on everyday Arabic or Quranic reading.
For anyone learning Arabic alphabet calligraphy for beginners, that structure is a real advantage. Your weekly lessons improve letter recognition, vocabulary, and pronunciation, and every new word gives you fresh material for your practice sheets. Instead of copying shapes you can’t read, you’ll write phrases you understand.
Inside Kalimah Center: Moments from Our Courses
Get a glimpse into the vibrant learning experience at Kalimah Center. These snapshots capture real moments from our live classes—where students engage deeply, connect with passionate instructors, and grow in a welcoming, supportive environment.
Master Arabic with Kalimah Center
Join our expert-led online classes and start your journey toward Arabic fluency today.
Book Your Free TrialStart Learning Arabic With Kalimah Centre Today!
You now have a clear plan for your pen. The next step is to give your practice real language behind it. Join Kalimah Centre today and turn every letter you draw into a word you can read, pronounce, and understand.
Book your first free lesson, choose individual or group classes, and follow a learning path that matches your goals, whether that’s everyday Arabic, Quranic reading, or support for your children. Our teachers guide you level by level, so you always know your next step.
Explore Our Courses:
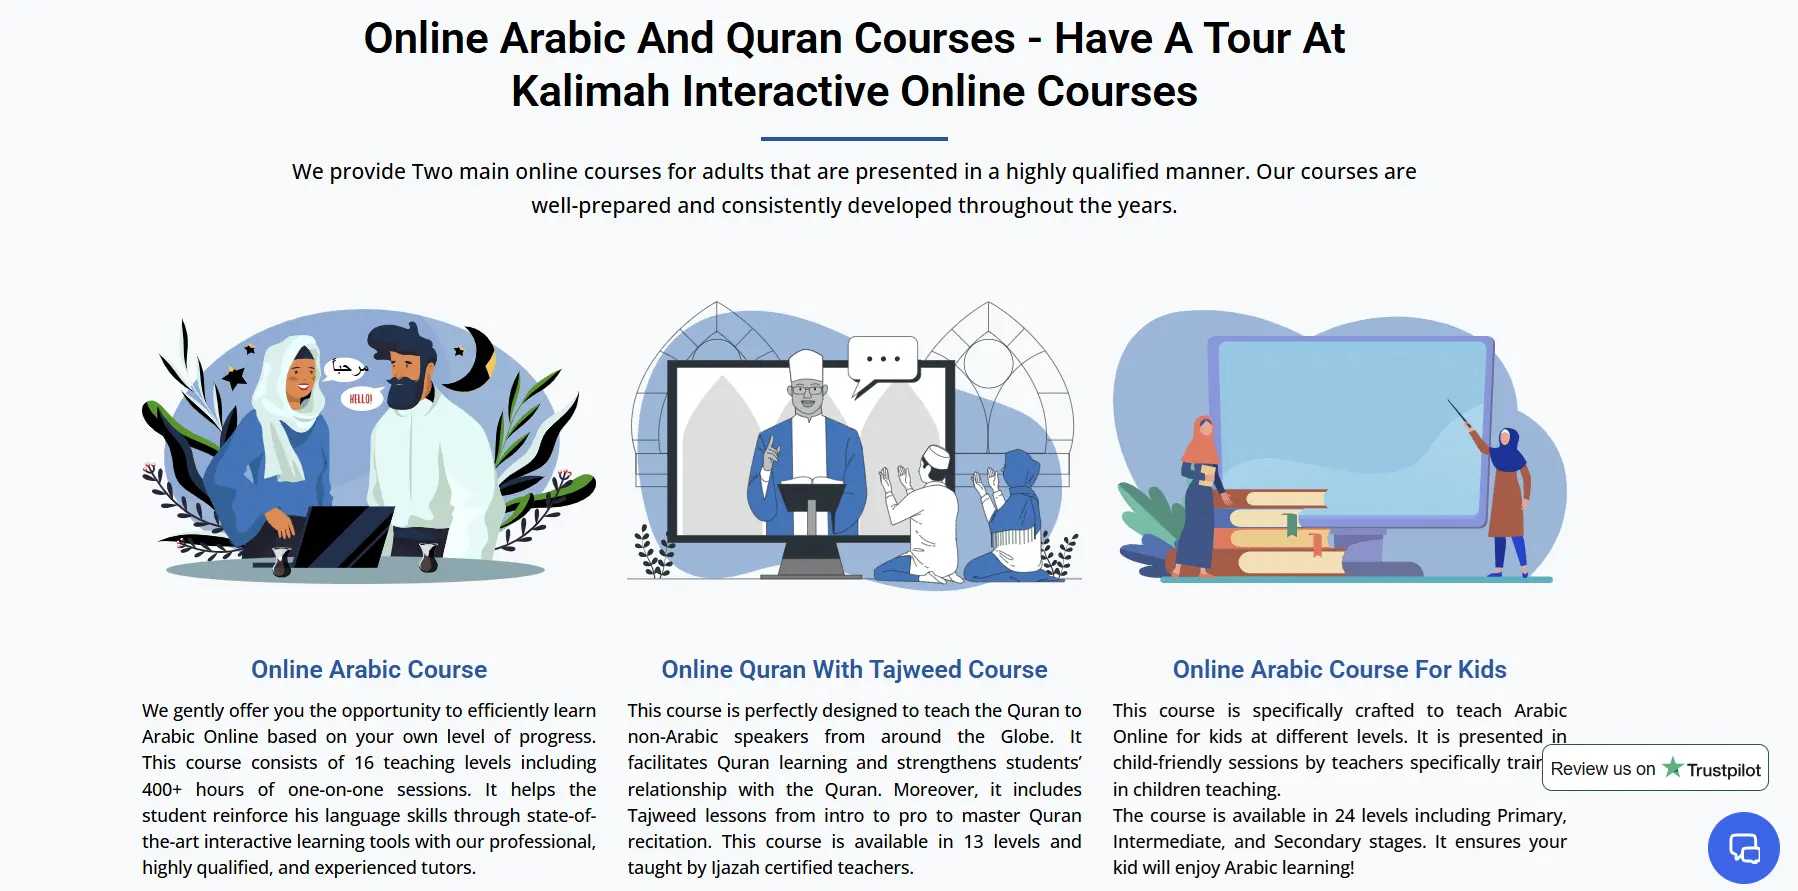
Online Arabic Course: Tailored to your level, our comprehensive Arabic program includes 16 teaching levels and 400+ hours of personalized sessions.
Online Quran With Tajweed Course: Perfect for non-Arabic speakers, our course spans 13 levels and equips you with Tajweed mastery from beginner to advanced.
Online Arabic Course For Kids: Nurture your child’s love for Arabic with our engaging and structured program, available in 24 levels for primary, intermediate, and secondary stages.
Don’t let your practice sheets sit unread. Visit Kalimah Centre now, enroll in the program that fits you, and start building the Arabic skills that give your calligraphy meaning, one lesson and one beautiful letter at a time.

Master Arabic with Kalimah Center
Join our expert-led online classes and start your journey toward Arabic fluency today.
Book Your Free TrialConclusion
You started by choosing Naskh as your first script and gathering a simple pen, smooth paper, and black ink. Then you learned how a steady pen angle and the rhombic dot keep every letter in proportion. From there, you practiced letters in shape families, studied their four positions, and joined them into words.
Progress in calligraphy comes from routine, not talent. Twenty focused minutes a day, guide grids, master models, and dated practice sheets will show steady improvement. Free tools such as printable dot grids, painting apps, handwriting keyboards, and online museum collections give you extra support at no cost.
The key lesson is simple: master one script, measure everything, and practice a little every day. Arabic alphabet calligraphy for beginners is less about perfect letters on day one and more about patient repetition that trains your eye and hand together. Pick up your pen today and write your first alif.
Frequently Asked Questions
How Long Does It Take To Learn Arabic Calligraphy As A Beginner?
Most beginners write clean Naskh letters within three to six months of daily practice. Arabic lessons at Kalimah Centre speed this up, because reading the letters sharpens your eye for their shapes.
Do I Need To Know Arabic To Learn Calligraphy?
No, you can copy letter shapes without speaking Arabic, but knowing the language makes your work far more accurate and meaningful. Kalimah Centre’s courses help you read and understand every word you write.
What Is The Easiest Arabic Calligraphy Style For Beginners?
Naskh is the easiest style for beginners because its letters are clear, balanced, and close to printed Arabic. Kalimah Centre’s reading-focused lessons reinforce Naskh shapes, so your practice and your reading grow together.
Can Children Learn Arabic Alphabet Calligraphy?
Yes, children can start with markers and large guide grids once they recognize the basic letters. Kalimah Centre offers Arabic lessons made for kids, giving them the letter knowledge that makes calligraphy easier and more fun.
How Many Letters Are In The Arabic Calligraphy Alphabet?
The Arabic alphabet has 28 letters, and most of them take up to four forms depending on their position in a word. Kalimah Centre teaches each letter’s sounds and forms step by step, giving you a solid base for calligraphy.